Every year or two, my GnuPG keys expire on KeyBase and in various key servers. Every time, I forget the process, and have to re-learn it. This post serves as a reminder to myself, or anyone else trying to do the same thing. It’s trivially easy, and there are GUI applications which can do it for you, but I went with this solution, since everyone should be able to do it.
Setup
When I created my KeyBase account, I utilized a key pair that I had already been using. I don’t know if this works if you had KeyBase KeyBase generate your key for you, but I suspect it would.
To run GnuPG, you need to install it first. I was on a Microsoft Windows 10 system, so I just used Ubuntu as part of the WSL. It has mostly replaced my need for virtual machines on my personal desktop, and it integrates well into Windows 10. If your Ubuntu WSL system does not come with GnuPG already installed, you can install it by running:
sudo apt install gnupg
On to the keys
Since the WSL system may not have your key pair installed, as mine didn’t, you may have to get them imported into GnuPG. If you already have your key pair in GnuPG just skip ahead.
Importing the Public Key
First, I downloaded the public key. This is the command given when you click on anyone’s public key on KeyBase.
curl https://keybase.io/<your_username>/pgp_keys.asc | gpg --import

Importing the Private Key
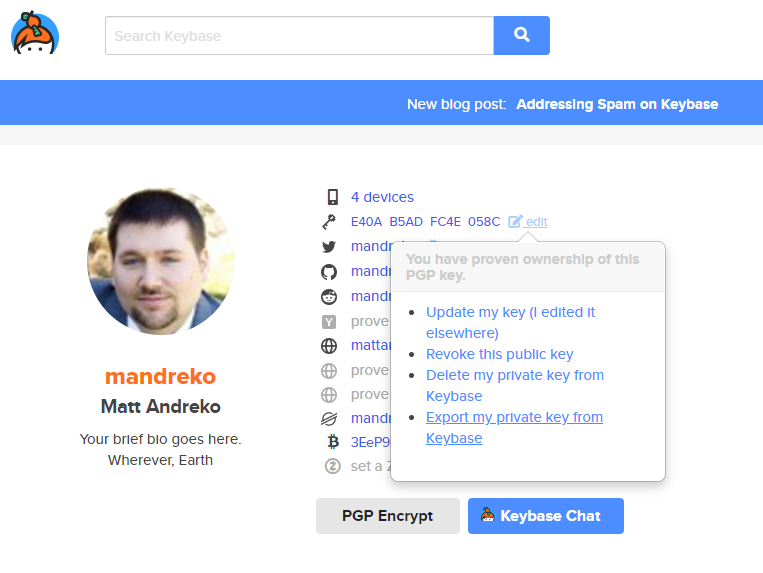
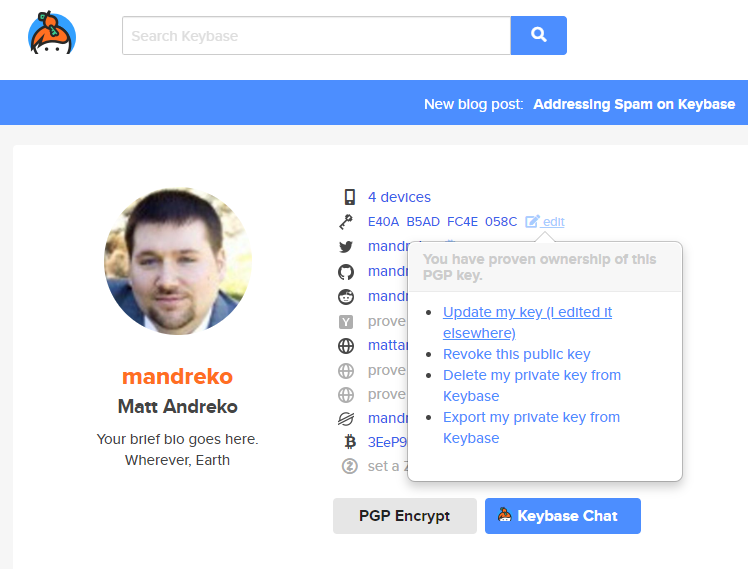
I didn’t have my private key on this system, so I downloaded it straight from KeyBase. If you’re logged in, and view your own profile, you should have an “edit” button with an option to export your private key. (You’ll likely be prompted for your KeyBase password to perform this action)
Save this file somewhere that the WSL system can see. You’ll then want to import it onto GnuPG on the WSL system using the following command:
gpg --import <downloaded_file>.key

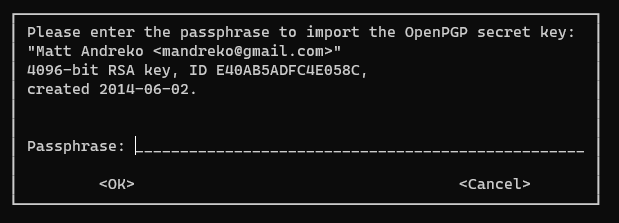
Once you start this import, it’s going to ask you for the password to the key. This one took me a while, because I thought it would be the same password that I originally used to import it years ago. However, this key is encrypted with your KeyBase password! Copy your KeyBase password from your password vault, and paste it into the GnuPG dialog.
Verification
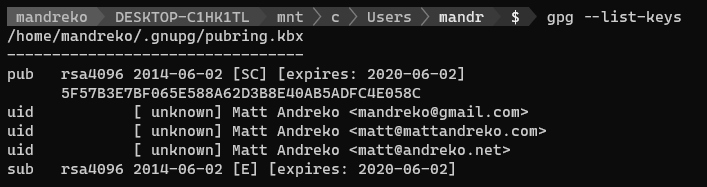
Before continuing, make sure that both your keys were imported properly. You should be able to see them if you run:
gpg --list-keys
gpg --list-secret-keys
Editing the Keys
To begin editing these keys’ expiration dates, enter the edit mode of GnuPG, passing it your key’s fingerprint value:
gpg --edit-key <your_key_fingerprint>
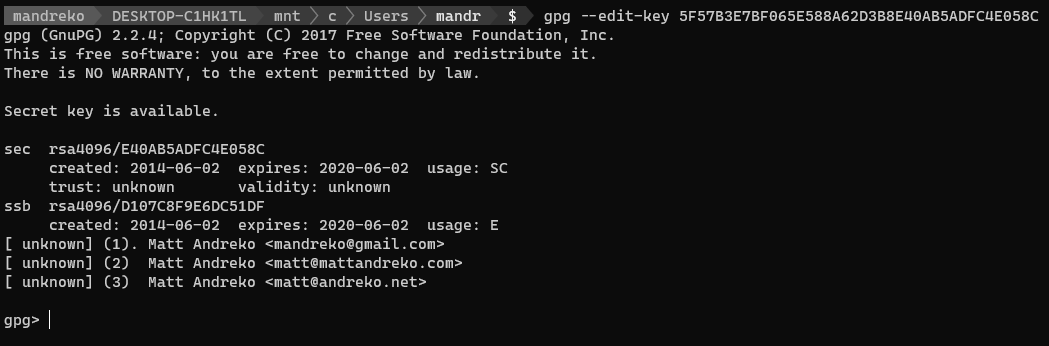
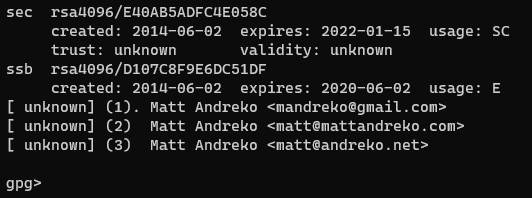
From here, you can list any potential subkeys that you may have. I have subkeys for each of my email addresses, so that I can use this same GnuPG identity with any of the email addresses. Yours may not have as many listed.
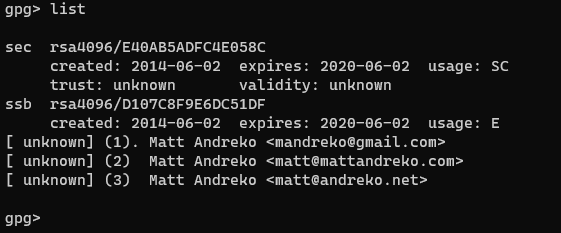
gpg> list
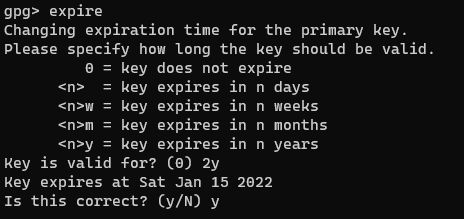
First, let’s change the expiration on the private key by entering the “expire” command:
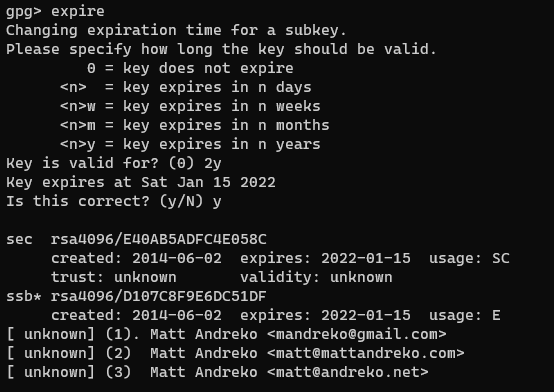
gpg> expire
Then it will prompt you to change the expiration date. I specified 2 years this time, but you can choose anything you want, even a key that does not expire, although that has it’s own issues.
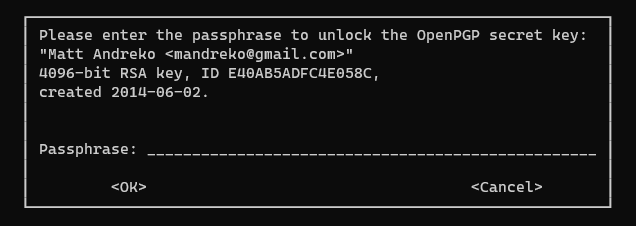
To make this change, GnuPG will then prompt you for your password again. Remember, if you exported it from KeyBase, this will be your KeyBase password.
GnuPG will return to list you the keys, where you can see that your private key is now showing an updated expiration date.
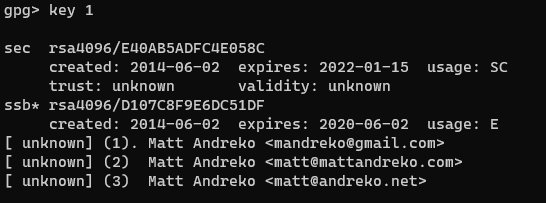
However the public key is still with the old date. The process is exactly the same as the private key, except we just need to select the public key first. Select it by using the following command:
gpg> key 1
Note that if you need to make additional changes to your secret key, you can select it again with:
gpg> key 0
Once again, enter the “expire” command and set an expiration date:
Lastly, remember to persist these changes to disk with the “save” command:
gpg> save

Additionally, you can export the new public key to a file:

Updating KeyServers
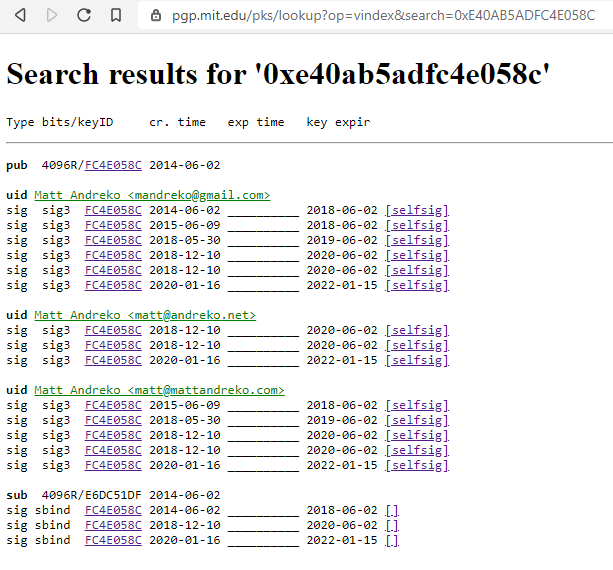
After updating your keys, you will want to distribute your new public key. I always send mine to the MIT keyserver, as it’s commonly searched. You can do it directly through GnuPG:
gpg --keyserver pgp.mit.edu --send-keys <your_key_fingerprint>

Shortly after, you can view it on the MIT Keyserver site. It should have your new expiration date listed.
Updating KeyBase
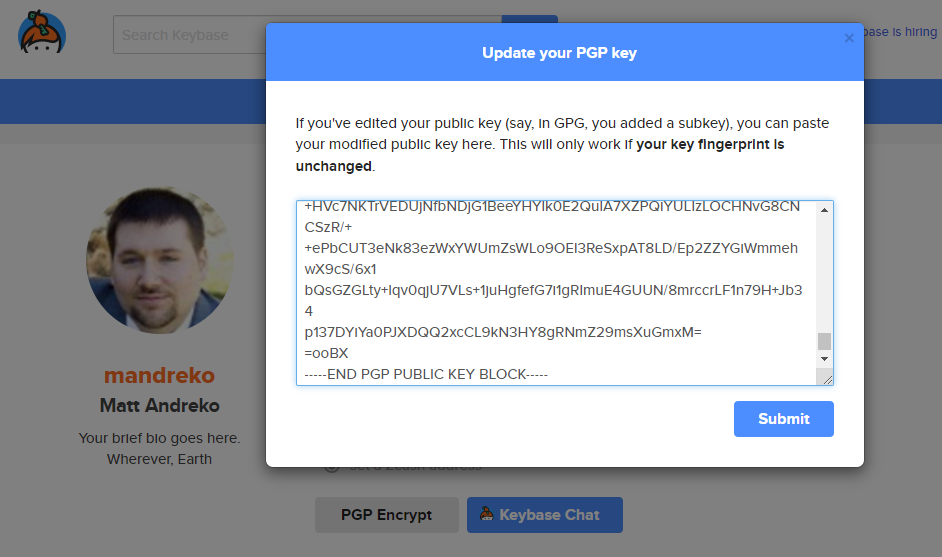
If you used KeyBase to start with, you’d ideally want to upload it to them as well. Login to KeyBase, and go to your profile. There should be an “edit” link with an option to “Update my key (I edited it elsewhere)”. Click this link.
This will allow you to enter your public key. Open the file that you exported earlier, and copy the contents out of it, and put into this text box. Once done, click “Submit”.
Conclusion
There you have it. It’s really a simple process, but one that I’ve had to research every time my key comes close to expiring. Hopefully it can save you a half hour of research as well.
Additionally, instead of having to generate a new key, you’ve updated your existing one. This means that if someone uses your old public key, you should still be able to decrypt a message. Additionally, if you used KeyBase, you don’t have to redo all your verifications. It can be quite tedious, and also draws suspicions since it alerts all your friends that you revoked your old key.
")